Before you use any instant exchange, a question naturally comes up: do I need a specific wallet? Do I need to create an account somewhere first? What am I actually working with here?
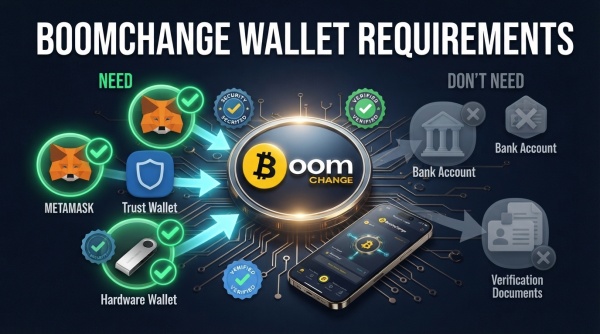
The short answer: you need an external wallet to hold your crypto before sending it. You don't need anything else. Let me explain what that means in practice.
What Boomchange Doesn't Require
No Boomchange account. There's no registration, no login, no user profile. You visit the site, set up the exchange, and go.
No exchange account. You don't need a Coinbase account, a Binance account, or any other centralized exchange account. Boomchange is a standalone service.
No specific wallet. Boomchange doesn't require you to use any particular wallet. Any wallet that can send the cryptocurrency you want to convert will work.
What You Do Need: An External Self-Custody Wallet
Here's the core requirement: the crypto you're converting needs to be in a wallet you control — specifically, one where you hold the private keys or seed phrase.
This is called a self-custody wallet (or non-custodial wallet). You control the funds. The wallet provider can't access your balance. And most importantly: you can send crypto directly from this wallet to any address you specify, including a Boomchange deposit address.
Examples of self-custody wallets by crypto type:
For Ethereum, ERC-20 tokens (LINK, UNI, SHIB), and EVM-compatible chains (Polygon, Arbitrum, Optimism, BNB Chain):
- MetaMask
- Trust Wallet
- Rainbow Wallet
- Rabby
- Ledger (hardware wallet, all networks)
For Bitcoin:
- Electrum
- Exodus
- Trust Wallet
- Ledger
For Solana:
- Phantom
- Solflare
- Backpack
For USDT TRC-20 (TRON):
- TronLink
- Trust Wallet
For Aptos:
- Petra
- Pontem
For Sui:
- Sui Wallet
- Suiet
For Cosmos-based assets (ATOM, INJ, OSMO):
- Keplr
- Leap
- Cosmostation
For Hedera (HBAR):
- HashPack
- Blade Wallet
For TON:
- Tonkeeper
- MyTonWallet
Can You Send Directly From a Centralized Exchange?
Technically yes — but with caveats.
If you hold BTC on Coinbase, you can withdraw it directly from Coinbase to the Boomchange deposit address. You don't need to transfer to a self-custody wallet first.
The risk: some exchanges have withdrawal delays, withdrawal fees, or minimum withdrawal amounts that complicate the process. Also, some centralized exchange withdrawals route through their own wallet infrastructure, which can add processing time.
For simplicity and speed, the recommended approach is:
- Keep your crypto in a self-custody wallet you control
- Send directly from that wallet to the Boomchange deposit address
If you only have crypto on a centralized exchange and haven't set up a self-custody wallet, you can still use the exchange withdrawal function — just confirm the exchange supports withdrawing on the specific network Boomchange requires (TRC-20, ERC-20, etc.).
The Network-Wallet Match Is Critical
Whatever wallet you use, confirm it supports the specific network you're sending on. This is where most errors happen.
USDT exists on multiple networks. Your wallet might hold USDT on Ethereum (ERC-20), TRON (TRC-20), or BNB Chain (BEP-20). If Boomchange generates a TRC-20 deposit address and your wallet is set to the Ethereum network, you'll send on the wrong chain.
The check is simple: before sending, look at:
- The network label on the Boomchange deposit address (e.g., "TRC-20" or "Optimism")
- The active network in your wallet
- Confirm they match
If they don't match, switch your wallet to the correct network before sending.
Do You Need a Specific Amount in the Wallet?
Boomchange's minimum transaction is $10. Your wallet needs to hold at least that much in the crypto you're converting, plus enough to cover the network transaction fee.
For most networks other than Ethereum mainnet, the transaction fee is negligible — fractions of a cent. For Ethereum ERC-20 tokens, the gas fee can range from a few dollars to $20+ during busy periods. Make sure your ETH balance covers gas when sending ERC-20 tokens.
The Two-Minute Setup If You Don't Have a Wallet Yet
If you don't have a self-custody wallet:
Download Trust Wallet — it supports hundreds of cryptocurrencies across dozens of networks in one app, available on iOS and Android. It takes about 90 seconds to set up. Write down your 12-word recovery phrase and store it somewhere safe. That phrase is the backup — keep it offline, never share it.
Once set up, transfer your crypto from wherever it currently lives (exchange, another wallet) to your Trust Wallet address. Then use Boomchange to convert it.
The Summary
To use Boomchange: you need a self-custody wallet that can send the crypto you want to convert. You don't need a Boomchange account, a specific wallet brand, or any other platform setup. The wallet just needs to support the crypto and the network you're sending on.
That's the full requirement. Simple in principle — just worth knowing before you start.